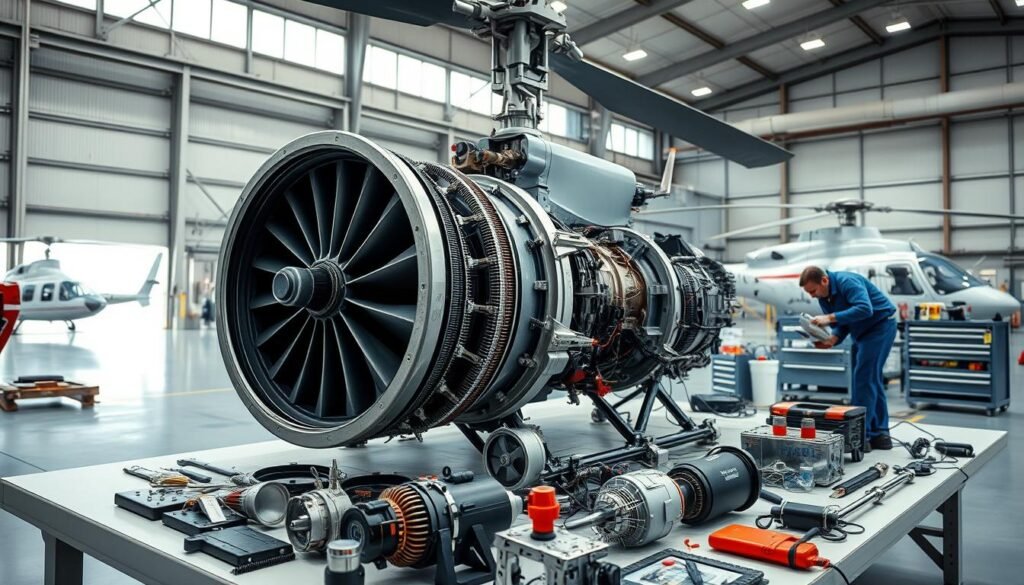
One study found structured pre-flight checks cut on-ground errors by more than 30%. That striking drop shows how process and discipline shape safe flight operations.
The Helicopter Maintenance Checklist opens with a clear walkaround that inspects exterior structure for cracks, dents, corrosion, and leaks. It then moves through rotor condition, landing gear, brakes, fuel quality, oil levels, and hydraulic systems to prevent engine and powerplant issues.
In the cockpit, crews verify avionics, required documents, and current NOTAMs and weather. They follow manufacturer engine start and systems checks, brief emergency procedures, and log every action to support airworthiness and FAA directives.
This approach ties crew duties to technical steps and emphasizes routine training to keep reliability high. For deeper guidance on scheduled service intervals and documentation best practices, see a practical resource on long-term care at service and recordkeeping and a detailed pre-flight rundown at pre-flight inspections.

Key Takeaways
- Structured checks reduce errors and set a safety baseline.
- Inspections flow from exterior integrity to in-cockpit systems.
- Documenting actions preserves airworthiness and regulatory compliance.
- Crew coordination and training are as vital as technical steps.
- The checklist adapts with ADs, service bulletins, and manufacturer updates.
Helicopter Maintenance Checklist Overview For Ensuring Safety Today
A reliable pre-flight routine merges crew readiness with technical checks to protect system integrity. It begins with fitness verification: rest, medical currency, and valid licenses for every crew member. This human step reduces errors and supports defensible safety decisions.
Next comes the exterior visual inspection of the aircraft. Pilots and technicians scan for signs of corrosion, cracks, dents, and fluid anomalies before any engine power is applied. Rotor system checks, landing gear alignment, and fuel cap security follow in a logical flow.
Avionics functionality — radios, GPS, and transponder — must be confirmed alongside valid documents, weather briefings, and NOTAM review. Filing a flight plan completes pre-flight tasks and formalizes intent with air traffic services.
Structured time management and pause-and-point practices keep teams from rushing. Documenting each pre-flight inspection and cross-checking against maintenance status, MELs, and CDL items preserves traceability.
- Consistent steps align pilots and technicians across aircraft types.
- Systems awareness supports early detection and reliable flight ops.
- This blog-style overview helps standardize field practices while keeping technical rigor.
Helicopter Maintenance Checklist
Pre-Flight Inspection begins outside: start at the nose and move clockwise to check each exterior panel, the fuselage, tail boom, rotor blades, landing gear, lights, and antennae. This ordered walkaround reduces missed items and speeds safe departure.
Pre-Flight Inspection Flow From Exterior To In-Cockpit Procedures
After the exterior sweep, enter the cabin and verify cockpit controls, seatbelts, and harnesses. Power up avionics and confirm radios, GPS, and transponder function. Use a pause-and-point method for emergency equipment so fire extinguisher, ELT, and first aid gear are never skipped.
Engine Start And Systems Check Before Taxi
Follow the manufacturer procedure for engine start exactly. Confirm warning lights and gauge cycles stabilize before engaging the rotor. Verify rotor brake status, throttle or FADEC mode, and tactile control freedom.
Post-Flight Notes To Capture Wear, Leaks, And Damage
Record any leaks, unusual wear patterns, control stiffness, or fuel odors immediately. Crew entries should be actionable so technicians can prioritize inspections. If airworthiness is in doubt, they ground the aircraft until corrected.
Time-Saving Yet Thorough Techniques To Avoid Missed Steps
Begin early, use digital checklists, and cross-check critical system items aloud. Brief passengers on emergency exits and seatbelt operation before start. For practical safety tips, see top safety tips for pilots.

Regulatory Compliance And Airworthiness Documentation
Accurate records and timely directives prevent regulatory gaps that risk flight safety. Good paperwork ties every repair and inspection to an auditable trail. It also proves compliance with directives from the aviation authority.

Federal Aviation Administration Airworthiness Directives And Compliance
They must research and track applicable airworthiness directives from the federal aviation administration. Each AD gets logged, dated, and linked to the repair or inspection entry.
Compliance actions should influence maintenance planning so recurrent tasks are scheduled and closed on time. For reference on inspection methods and return-to-service criteria consult FAA guidance on repairs and inspections: FAA guidance on repairs and inspections.
Logbooks, Maintenance Records, And Required Aircraft Documents
Require a document check for the airworthiness certificate, registration, and Pilot’s Operating Handbook before release to service. Verify tail number, expiration, and operating limitations.
- Standardize entries: task description, references to manufacturer instructions or ADs, parts used, and return-to-service signatures.
- Align inspection scheduling with regulatory intervals and internal quality systems.
- Use spot audits to ensure required documents are present and accurate.
| Record Type | Required Details | Frequency | Audit Action |
|---|---|---|---|
| Logbook Entry | Task, AD ref, parts, signature | After each repair/inspection | Weekly sample review |
| Certificates & Documents | Airworthiness, registration, POH | Pre-release check | Pre-flight spot check |
| Inspection Schedules | Interval, compliance notes | Planned quarterly/annual | Calendar reconciliation |
| Retention Records | Work orders, parts invoices | Regulatory retention period | Archive verification |
Exterior And Structural Integrity Checks
A careful exterior walkaround uncovers early signs of structural compromise before flight. This inspection protects safety and confirms the aircraft is fit for its next sortie.

Fuselage, Tail Boom, And Structural Integrity Assessment
They examine fuselage skin, longerons, and tail attach points for cracks, buckling, paint blistering, or past repairs that exceed manufacturer limits.
Use mirrors and calibrated flashlights to reveal hidden corrosion or fastener migration. Document any signs of deformation or leaks and tag for further inspection.
Landing Gear Condition, Alignment, And Brake Readiness
Verify skids or wheels are straight and secure. Check brake lines, master cylinders, and pad thickness for wear and leaks.
If alignment or fluid loss is present, place the aircraft on a maintenance hold and record the findings with photos.
Rotor Blades, Rotor Hub, And Tail Rotor Visual Inspection
Inspect rotor blades and hub for nicks, delamination, leading-edge erosion, and loose hardware with torque marks visible.
Check tail rotor couplings, pitch links, and safety wiring to prevent in-flight control loss. Reference manufacturer service bulletins to decide blend-out limits or removal for detailed inspection.
- Confirm lights, strobes, and antennae are present and operational for safe landing and cruise phases.
- Log all exterior findings and link them to work orders for traceability and regulatory compliance.
Rotor, Flight Controls, And Hydraulic Systems
Verifying smooth, full-range movement of primary controls prevents in-flight surprises and enables precise handling. Inspectors begin with a tactile sweep of the control runs before powering systems.
Collective, Cyclic, And Anti-Torque Pedal Freedom Of Movement
Confirm full-range, unobstructed movement of collective, cyclic, and anti-torque pedals. Note any stiffness, binding, or asymmetry in response.
Check friction settings, bellcranks, and gear for correct lubrication and secure fasteners. Inspect rotor head components for play while blades are static and verify safety wire and torque marks.

Hydraulic System Operation, Lines, And Fittings
Power the hydraulic system and verify operating pressure and accumulator status. Watch for aeration or fluid foaming under load and confirm the absence of seepage.
Inspect hydraulic lines, fittings, and servos for chafing, heat damage, or leaks. Evaluate tail control rods and pitch links for security, cotter pins, and correct rigging to maintain yaw authority.
“Control system integrity is the foundation of safe handling; any anomaly must ground the aircraft until corrected.”
- Action: Record anomalies and coordinate repairs immediately.
- Verification: Require dual sign-offs and a ground-run control sweep after work is completed.
| Check Area | Key Criteria | Action |
|---|---|---|
| Control Freedom | Smooth travel, no binding, correct friction | Log issue; tag for rigging or repair |
| Hydraulic Operation | Pressure within limits, no aeration, accumulator OK | Perform system bleed/test; repair leaks |
| Linkages & Hardware | Secure cotter pins, torque marks, no corrosion | Lubricate; replace worn parts |
For guidance on operational discipline and common pilot error reduction, consult a practical resource on safe flying practices at how to avoid common pilot errors.
Engine, Fuel, And Fluid Systems
Verifying fluid levels and component wear before power application reduces start-time surprises. Inspectors confirm oil and fuel condition first, then scan compartments for visible damage and wear.
Oil Level, Filters, And Signs Of Leaks Or Wear
They verify engine oil level is within the manufacturer’s range and inspect filters and chip detectors. Any metallic debris or out-of-limit readings are documented.
If signs of leaks or abnormal wear appear, the aircraft is deferred until corrective action is complete.
Fuel Quantity, Quality, And Cap Security
Technicians sample fuel at each sump, confirming correct grade, color, and no water or particulates. They re-sample until clear and secure caps to proper torque.
Powerplant Compartments, Hoses, And Hydraulic Fluid Scans
Inspect engine bays for heat distress, chafed hoses, loose clamps, and damaged wiring. They check hydraulic reservoir levels and scan fittings and actuators for weeps.
During start, fuel boost pump operation and pressure indications are confirmed. Engine start parameters—temperatures, pressures, and RPM—are cross-checked against manufacturer limits and any exceedance aborts the start.
“Documenting condition findings and tying each entry to a work order preserves traceability and supports safe return-to-service.”
- Evaluate wear markers on belts, filters, and mounts; defer aircraft if limits exceed tolerances.
- Use service bulletins to verify correct parts and fluid specs.
- Finish with a final condition scan before closing cowlings to ensure panels are secure and caps locked.
| Check Area | What To Verify | Action If Out Of Limit |
|---|---|---|
| Oil & Filters | Level in range; no metal; clean filters | Log discrepancy; replace filters; tag for repair |
| Fuel Quality | Sump clear; correct grade; caps secure | Drain/re-sample; secure caps; record action |
| Engine Bay | Hoses, clamps, wiring, heat damage | Document damage; defer until fixed |
| Hydraulic System | Reservoir level; no weeps; pump operation | Bleed/test; repair leaks; verify pressures |
Avionics, Instruments, And Electrical Systems
Begin cockpit checks by energizing the electrical bus to validate radios, GPS lock, and annunciator behavior. This early power-up lets the crew confirm that core flight systems will support the planned operation.

Radios, GPS, Navigation, And Transponder Functionality
Perform an avionics power-up and verify radios transmit and receive clearly. Confirm GPS satellite acquisition and select the correct navigation source.
Set the proper transponder code and mode. Ensure audio panel routing sends essential comms to the pilot’s headset and that backup comm/nav options are available.
Altimeter Setting, Warning Lights, And Gauge Test Cycles
Set the altimeter to the current field elevation and cross-check baro readings with GPS altitude. Run the annunciator and gauge test so lights illuminate then extinguish as designed.
Validate gauge sweeps against normal ranges and note any delay, dimming, or mismatched readings for follow-up.
Battery Health, Alternator Output, And Circuit Breakers
Measure battery voltage prior to start and confirm alternator or generator output rises and stabilizes after engine start. This proves the charging system is functioning.
Inspect circuit breakers for correct positions and avoid unauthorized pulls. If a breaker trips during checks or start, capture the fault and hold the aircraft until resolved.
“Any avionics or electrical anomaly must be recorded and deferred to maintenance before flight.”
Finish with a final check to ensure required avionics for the mission are configured and software versions are documented in the log. Capture anomalies, then ground the aircraft until electrical and avionics discrepancies are corrected.
Interior, Emergency Equipment, And Pilot Readiness
Interior inspection verifies that seats, restraints, and cabin fittings will protect occupants during normal and contingency operations.
Inspect seats, rails, and harnesses for proper locking and for any fraying or latch malfunction. Correct defects before dispatch so the crew can focus on flight duties.
Verify doors and windows open and latch smoothly. Ensure safety placards and exit markings are legible and unobstructed for quick egress.
Seats, Harnesses, Doors, And Cabin Safety Condition
Review the cabin for loose objects and FOD that could shift during turbulence or autorotation. Secure charts, baggage, and tools so nothing becomes a projectile.
Note any interior discrepancies and log them immediately; safety-critical cabin issues must be resolved before the aircraft departs.
Fire Extinguisher, ELT, First Aid, And Survival Gear Status
Confirm the fire extinguisher is charged, sealed, and accessible. Check ELT status and battery dates, and verify the first aid kit is complete and within service limits.
Coordinate with crew to stage survival gear appropriate to the route and weather. Place kits where they are reachable and properly attached.
“Emergency gear should be verifiable at a glance; accessibility is as critical as presence.”
| Item | What To Verify | Action If Non-Compliant |
|---|---|---|
| Seats & Harnesses | Locks, no fray, secure rails | Repair/replace; tag out of service |
| Doors & Placards | Latch smooth, markings legible | Service hinges; replace placard |
| Emergency Equipment | Extinguisher charge, ELT status, first aid | Restock/repair; record service |
| Survival Gear & Documents | Accessible gear; required documents onboard | Stage gear; update documents; delay flight if needed |
Close Out Procedures: Conduct a pre-flight passenger briefing covering seatbelt use, door operation, emergency egress, and sterile cockpit expectations. Confirm the pilot carries current documents, medical certificate, and is fit for duty.
For a focused reference on essential pre-flight actions, consult the pre-flight items you should never skip.
Scheduled Inspections, Record Keeping, And Continuous Training
Scheduled reviews and clear record routines are the backbone of long-term aircraft reliability. Adherence to manufacturer intervals and planned inspections ensures systems stay within design limits and reduces the risk of in-service failures.
Manufacturer Maintenance Schedules And Routine Checks
Operators should implement manufacturer-prescribed service items and plan major inspections well before due dates. A mix of time-based and cycle-based checks keeps component life limits under control.
Proactive scheduling reduces downtime by aligning parts procurement, technician availability, and required inspections in advance.
Accurate Record Keeping To Support Airworthiness And Trend Monitoring
Maintain complete documents for every task: part numbers, torque values, service bulletins, and return-to-service approvals. These entries support airworthiness and simplify audits.
Trend analysis of oil reports, vibration data, and defect logs improves integrity by flagging early signs of failure.
Ongoing Training For Maintenance Personnel And Flight Crews
Continuous training keeps technicians and pilots current with new systems and federal aviation administration guidance. Courses should mix systems theory, human factors, and hands-on inspections.
Internal quality checks and independent inspections validate work and close the loop between training and field performance.
- Plan manufacturer tasks and resource time ahead of due dates.
- Use tracking tools to forecast calendar and cycle tasks.
- Keep records audit-ready to prove compliance and value.
- Integrate federal aviation administration updates into recurrent training.
For a practical reference on routine procedures, consult this routine maintenance guide to align schedules and records with operational needs.
Conclusion
Consistent, line-by-line verification of systems is the single best defense against in-service failures. A rigorous checklist culture ties crew actions to technical evidence and supports long-term reliability. Teams should never start or taxi until leaks, out-of-limit oil readings, or faulty instruments are resolved and logged.
Pilot and technician responsibilities overlap: confirm fuel quality, verify engine indications, and validate landing gear and brake readiness before landing tasks begin. Rotor and control integrity require control sweeps and hydraulic checks; any doubt grounds the aircraft until fixed.
Adopt a disciplined approach: apply procedures exactly, document every action, and share lessons through the operator safety guide and an engine best-practices reference. Following these steps keeps operations compliant, efficient, and ready for the next mission.
FAQ
What are the critical pre-flight exterior checks from nose to tail?
The pilot or technician inspects the fuselage, tail boom, landing gear, rotor blades, hub and tail rotor for cracks, dents, loose fasteners, corrosion, or signs of impact. They verify blade tracking, check gear alignment and brake condition, confirm doors and latches secure, and ensure no fluid leaks are visible around the powerplant compartments or hydraulic lines.
How should engine start and systems checks be performed before taxi?
Follow the manufacturer’s start procedure, monitor oil pressure and temperatures, verify fuel flow and gauges, and confirm electrical systems, radios, and the transponder power up. Run the rotor engagement and flight-control freedom checks, listen for abnormal noises, and confirm warning lights extinguish before moving to taxi.
What post-flight notes help capture wear, leaks, and damage effectively?
Log any unusual vibrations, changes in oil or fluid levels, new leaks, abnormal engine indications, blade nicks, or wear on controls. Include exact times, flight conditions, and photographs when possible. This creates a clear record for trend monitoring and prompt corrective action.
How can crews save time without missing critical steps?
Use standardized flow patterns and written forms, perform checks in consistent sequence, and employ pre-flight templates from the manufacturer. Train crews on prioritizing safety-critical items first and use simple checklists and digital logs to reduce repetition and human error.
What FAA documentation and directives must be tracked?
Operators must track applicable FAA Airworthiness Directives, service bulletins, and special airworthiness information. They must maintain current type certificates and ensure compliance with mandatory inspections and modifications as published by the Federal Aviation Administration.
Which records and documents are required on board and in the logbooks?
Operators should carry airworthiness certificates, registration, operating limitations, and weight-and-balance data. Maintain up-to-date logbooks showing inspections, repairs, component times, and compliance with ADs. Accurate records support airworthiness and resale value.
What should be included in a structural integrity assessment?
Inspect primary structure, attachment points, rivets, welds, and composite surfaces for cracks, delamination, or corrosion. Pay special attention to the tail boom junctions, engine mount areas, and rotor hub fittings. Any damage beyond cosmetic requires engineering guidance.
How often should landing gear and brake systems be checked?
Conduct visual checks before each flight and scheduled detailed inspections per the manufacturer’s intervals. Verify tire condition, strut extension, brake pads, hydraulic lines and fittings for leaks, and alignment. Address abnormal wear or hydraulic fluid degradation immediately.
What are key items when inspecting rotors and the tail rotor?
Check blade chord and leading-edge condition, erosion protection, tracking marks, pitch bearing play, and hub integrity. Inspect the tail rotor for pitch change freedom, secure attachments, and absence of foreign object damage that could affect control authority.
How are flight control systems and hydraulics verified?
Confirm cyclic, collective, and anti-torque pedals move freely through full range with no binding. Check hydraulic fluid level, system pressure, lines, fittings, and actuators for leaks or degradation. Test hydraulic pumps and emergency systems per the checklist.
What oil and filter checks are essential for the powerplant?
Verify oil level within limits, inspect for contamination, and check filter condition and service dates. Look for external oil leaks around the engine and gearbox. Replace oil and filters according to the manufacturer schedule or sooner if contamination is suspected.
How should fuel be inspected for quantity and quality?
Confirm fuel quantity and balance against flight requirements, inspect caps and vents for security, and drain sumps to check for water and contamination. Use proper fuel testing procedures and records to ensure fuel quality before flight.
What avionics and instrument checks are mandatory preflight?
Power up radios, GPS, navigation systems, transponder, and autopilot if installed. Test altimeter setting, attitude and heading indicators, warning lights, and perform gauge cycles. Verify battery condition and alternator output to ensure electrical redundancy.
How is battery health and electrical system reliability assessed?
Check battery voltage and condition, inspect terminals for corrosion, and confirm alternator or generator output during engine run. Test circuit breakers and emergency bus operation. Replace batteries per service life or if performance degrades.
What interior and emergency equipment should be verified before flight?
Ensure seats and harnesses function, doors and emergency exits operate, and cabin condition meets safety standards. Verify fire extinguishers, emergency locator transmitter (ELT), first-aid kit, and survival gear are present, serviceable, and within expiration dates.
How often should scheduled inspections and manufacturer checks be completed?
Follow the manufacturer’s maintenance schedule and the operator’s approved program for calendar and flight-hour intervals. Perform periodic inspections, component overhauls, and mandatory checks per the maintenance manual to maintain airworthiness.
What record-keeping practices support safety and airworthiness trends?
Maintain accurate, timely entries for maintenance actions, component times, and inspections. Use consistent formats, retain service bulletins and AD compliance records, and analyze logs to spot trends like repeated leaks or unusual wear patterns.
Why is continuous training for maintenance personnel and flight crews important?
Regular training ensures technicians and pilots stay current with new procedures, manufacturer updates, and regulatory changes. Ongoing education reduces human error, improves inspection quality, and enhances decision-making during abnormal or emergency situations.y safeguards the aircraft but also contributes to the overall safety and efficiency of aviation operations.
Related Articles


